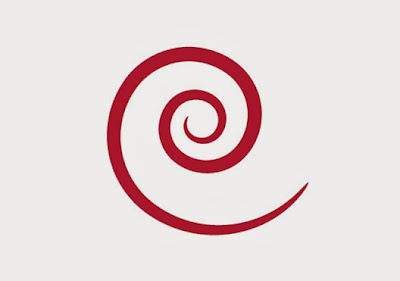
Preview of the result:
Set a color of your choice as fill color and none as stroke. Grab the ellipse tool (L) and create a circle. Press shift while drawing to maintain constant proportions.
Copy (ctrl+C) and paste in front (ctrl+F) the circle. Resize it, but make sure to press both shift and alt while resizing. Change the color of the new concentric circle.
Repeat the same process to create other concentric circles. Super easy! Once finished I suggest you to group all the objects (select the layers in the layer window and press ctrl+G). Swirl 2 is created with the same process with the only difference that fill color is empty while you have to set a stroke color.
With the ellipse tool create 2 circles of different size. Make the smaller yellow and apply a radiant gradient to the second one.
Select both the circles and go to Object>Blend>Make. Now double click on the blend tool icon and switch the settings as shown in the screenshot below:
Draw an arc using the Arc Tool
Swirl 4
Lets create a black circle and a shape using the pen tool (P).
Swirl 5
With the ellipse tool, create a super pressed ellipse. Drag the ellipse in the brushes window and select “new art brush” from the popup window. In the next window switch the method from “none” to “tints” (this will allow us to change the brush color later) and OK. Compliments: you’ve created an illustrator brush.
Create a circle and place it over the spiral
Select both the spiral and the circle and go to Object>Expand Appearance. Then go to Object>Path>Clean Up… (in this way we haven’t a brush, but only a path). Select again spiral and circle and press the “add to shape” button in the pathfinder window and expand. Now choose a fill color (mine is #6B2E39)
Now use the pen tool to create 2 shapes as shown below:
Apply the feather effect (Effect>Stylize>Feather) to both the shapes, with a feather radius around 10pt. Finished!
Swirl 6
Create a spiral and apply the same brushes used for swirl 5. With the spiral selected, go to Object>Expand Appearance. And Object>Path>Clean Up. Switch the color to crimson (#A9233C).
Create a little circle and place it at the end of the spiral. Select both spiral and circle, and press the “add to shape” button in the pathfinder window, then click on Expand in the same window.
Go to Object>Path>Offset Path and enter a value of -7 pt.
Use a lighter color for the inner shape (#F15B58). Go to Effect>Stylize>Feather and enter a value of around 8pt.
Create another spiral. This time give a 1px yellow stroke, and go to Object>Expand.
Dudplicate the spiral layer and move it on the top of all the other layers. Switch the fill color to none. We are going to create a clipping mask to eliminate the parts of the yellow spiral that exceed the edges of the red spiral. So select the yellow spiral and the empty spiral on top. Go to Object>Clipping Maks>Make.
Repeat the last step to add more details to your swirl:
Swirl 7
Lets start from Swirl 4:
Create a new shape using the pen tool. See the screenshot as a reference:
Switch the color of the last created shape to yellow (#EDE663) and apply the feather effect. Do the same with the red shape.
Swirl 8
We have to create an art brush: so lets start creating a black circle. Now use the direct selection tool (A) to select the right anchor point and move it on the right. Click on the same anchor point with the “Convert Anchor Point Tool”. Drag the result into the brushes windows and create a new art brush.
Create an arc using the pen tool. Then apply the just created brush. Now go to Object>Expand Appearance and then to Object>Path>Clean Up. Also switch the color to crimson (#6B2E39).
Switch the color of the inner shape to pink (#F15B58) and apply the feather filter with a radius around 8pt.
Swirl 9
Create a line with the Line Segment Tool. Now go to Effect>Distort & Transform>Transform and use the following settings to create a series of parallel lines.
Go to Object>Expand Appearance and again Object>Expand. Now create the Swirl 4 and put the lines upon the swirl. Rotate theme and set the color to white.
Duplicate the swirl layer and put it above all the other layers. Switch the fill color to “none”. This will be our clipping mask: select the lines and the empty swirl and go to Object>Clipping Mask>Make. Also set the layer to overlay (in the transparency window) and reduce the opacity to around 60%. Done!
Everything is done! Now you only have to play with your creativity. In my case I simply downloaded the image of a singer and then pasted in all the swirls. This is what I obtained:
And this is a present for you: the AI file with all the vectors of the tutorial (plus other vectors). Enjoy it and don’t forget to subscribe to our RSS for future updates!
See also
- Cosmetic Bottle Illustration
- Gradient Reflection & Glossy Surface
- Create an Aged Vintage Style Logo Design
- How To Create a Classic Vector Style Tattoo


Σχόλια
Δημοσίευση σχολίου